One of my clients owns a Fitness Business, and I have crafted and maintain her website (farmhousefitchick.com). She’s built a great business doing what she loves, and she wanted to augment revenue by allowing Google AdSense to strategically place relevant advertisements on various high traffic areas of her site. Great idea for passive income, until the ads break the site and it’s no longer available for the original intention of selling products, lead generation, education or entertainment.
With Google’s “Auto ads” you can set it up fairly well in your AdSense settings, but I’ve found we still have to continuously review your site for ad placement. When we found an ad placement was interfering with the site structure, I spent several hours combing through code, help files, etc. to realize it was a fairly simple fix. There is light at the end of this tunnel, and it’s pretty easy to find. Google has an edit and remove feature for auto-ads which allows you to find ad placements and remove the locations from future ads which you deem:
- break the layout
- interrupt user journey
- isn’t visible enough
- don’t like the placement
- other
This is done within a visual editor and is fairly simple. I’ve outlined the steps I took to remove ads which were loading in the sticky header of a wordpress site.
Modifying Google AdSense Ad Placement
First, log into your Google Adsense Account (https://www.google.com/adsense/).
In the Left Navigation Area, Select Ads > Overview
Then under your sites, find the site you want to modify ads on and click the Edit Icon

The Ad Settings Preview | yourwebsite.com appears and allows you to view specific page level URLs served on both mobile and desktop. (I’ll explain “Page excluded” later)

Since my issue was on desktop, I clicked the icon to have it repaint at that resolution.

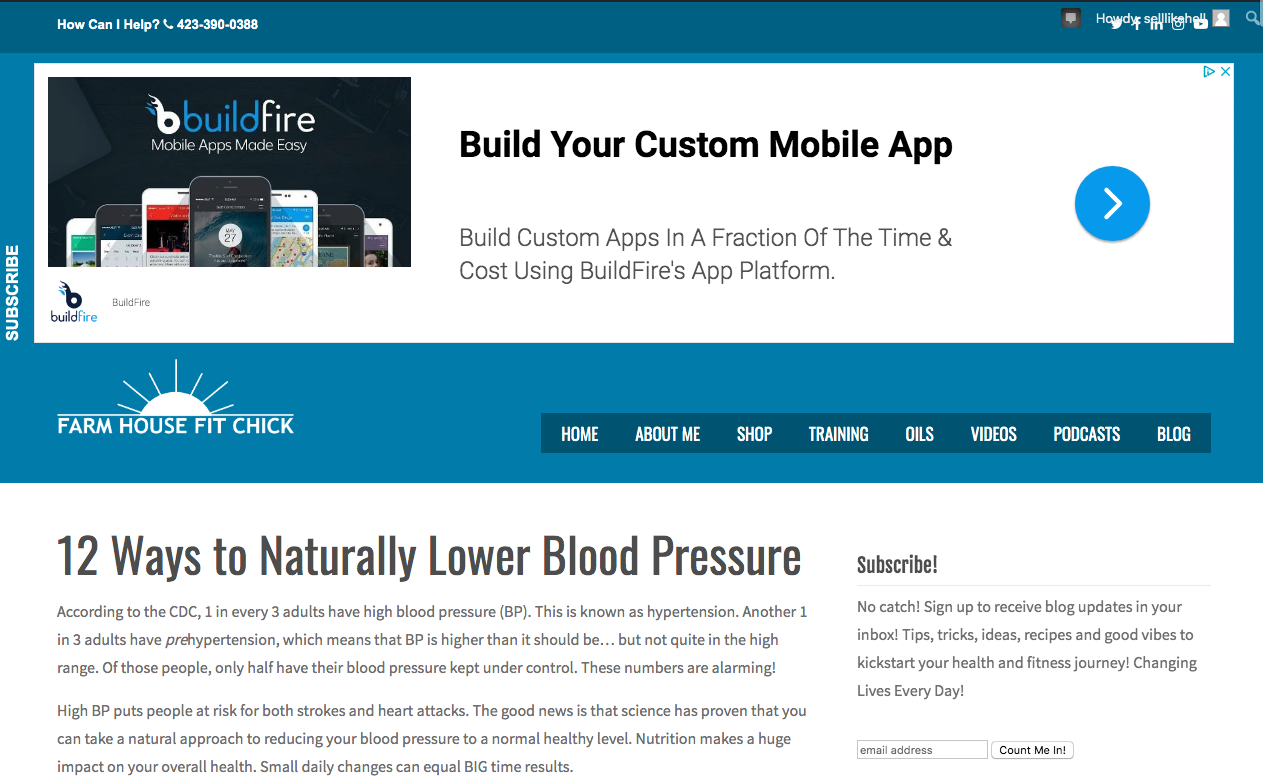
When the home page image loaded, I was able to use the site navigation to find the blog pages. This is where the ads were breaking my header navigation. The first image below is how it should appear, the lower image is what adsense was doing to my navigation. The problem isn’t just that the semi opaque blue took over one third of the page, it’s also that the page scrolled under the semi opaque blue!
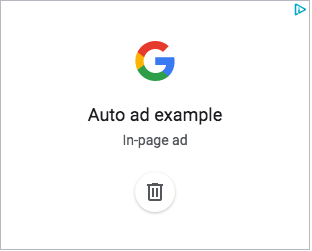
Now chose the ad placement which is damaging your site in some way. There are very easy to see representations of Google AdSense Ads in various sizes and configurations. Once you’ve found the bad ad placement, click the trash icon to begin removal. You may have several ad placements which don’t work with a particular site. For each of them you will have to follow the next steps specifically and entirely to have that ad placement removed.
Step 1 to Modifying AdSense Placement.
Click the trash ![]() icon of the ad you want to remove.
icon of the ad you want to remove.
Step 2.
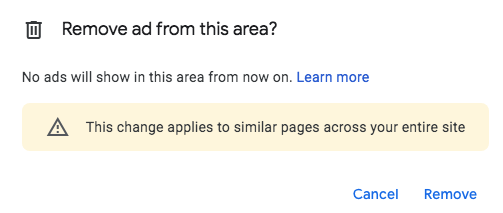
Remember this is a global edit, so no ads will show in this area on any pages using the same template. If this is your intent, go ahead and click “Remove”. If you haven’t thought through all of the potential ramifications of removing all such ads from all similar pages, perhaps now is a good time for you to back out and regroup.
Step 3.
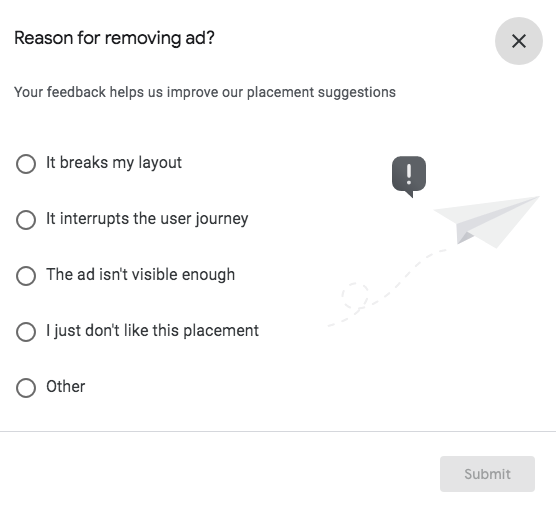
Provide Google with a reason. In my case, it actually broke my layout (specifically my header navigation). But you have options of choosing several different possibilities. None of them are wrong and none will change the operations outlined here (I think). Make your choice on one of the available radio buttons and then click “Submit”.
Step 4.
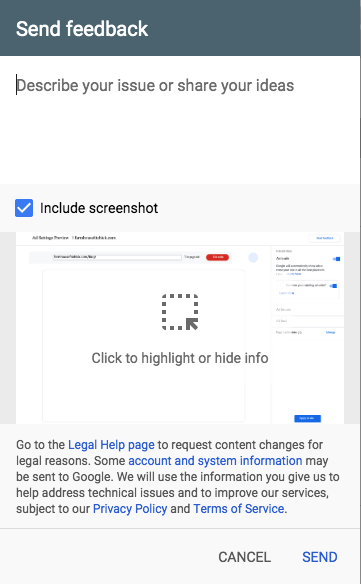 You HAVE TO PROVIDE FEEDBACK. This is where I went wrong several times and couldn’t understand why the ad formats area wasn’t showing any areas removed. Provide a brief description of the issue you’re having or take this as a forum to share your ideas with Google. I got the tool to work with or without a screen shot so perhaps the feedback is all that is required. When you’ve completed your free consultation to the googleverse, simply click ‘SEND’.
Now under “Ad formats” in the right navigation as you expand the section you will see a box containing the area(s) you’ve removed.
Don’t forget to clear the site cookies from your browser before you reload to test your handy work. For me it took a few minutes to propagate, but it worked exactly how I intended it to.
I took the time to document this process as I’m quite sure we’re not the only ones to have encountered this digital marketing issue with display and banner advertising. Hopefully this will cut your time to resolution to minutes rather than the hours I spent trying to identify the issue and resolve the problem.
~Cheers
CDS
Need some help? Drop us a line and let us know what you need.
